
Easy Garage Gym Flooring Guide: Pros, Cons, & Installation Tips
Garage Remodeling
Trying to decide what material works best for garage gym flooring? Don’t sweat it. Here’s a simple guide to your main options, pros and cons, and tips for installation. Whether you’re building your dream home gym to get that ripped Aquaman or Wonder Woman look or you just need something basic to help you stay fit and flexible, we’ve got you covered.
First, a Note About Installation and Maintenance
Before you actually start shopping for garage gym flooring, be sure to cover these practical considerations:
Now, think about your preferences and workout plans. The type of garage gym flooring you need if you’re into serious weight lifting, CrossFit training, or universal machines will be quite different than if you do strength training with light weights and floor exercises.
Q: Do you need gym flooring on concrete?
A: If you want to keep the existing concrete garage floor for your home gym, that’s not impossible. However, it’s not an ideal flooring material because the hard material is very unforgiving on your body and your weights. Exercising on concrete can cause muscle strain, discomfort, and even damage. Drop a weight on it, and you’re likely looking at some cracks. Adding some extra padding adds comfort and insurance.
Which Flooring Is Best for a Gym?
While some garage gym experts have clear favorites for garage gym flooring material, the answer really depends on how you’ll be using your garage gym.
For instance, if you plan to do some intense weight training with heavy dumbbells or heart-pumping aerobics that will put a lot of pressure on your joints, you should ensure the flooring you go with will be thick enough to help absorb the impact and protect your subfloor underneath.
Here are some of the main factors to consider when choosing garage gym flooring:
Now that you’ve got a good idea of your needs, let’s get into the types of garage gym flooring and how they fit with your workout style and plans. In terms of the actual workout surface, most people go with either rubber or foam gym flooring. But what goes underneath? While many people simply lay their rubber or foam gym flooring on top of their existing garage floor, others prefer to apply an epoxy finish to the concrete to create a more durable and attractive surface. So that’s where we’re going to start. (Use the links to skip to the sections you want.)
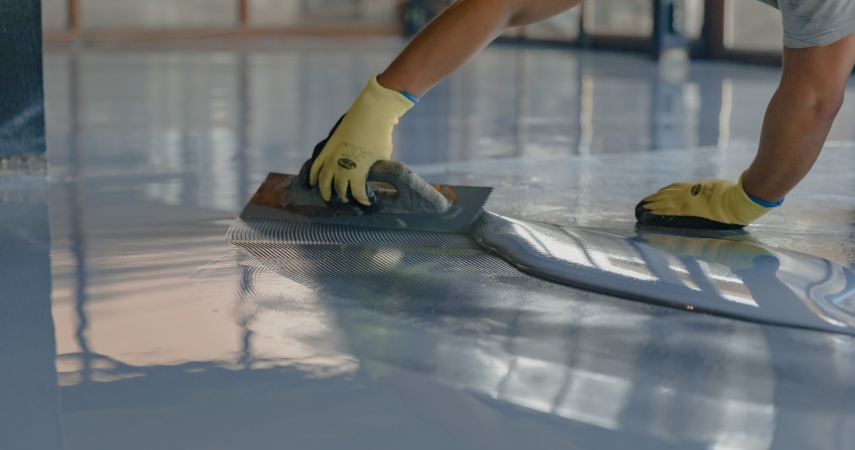
Smoothing out a coating of epoxy
Epoxy Garage Gym Flooring: Extremely Durable, Stylish, and Multi-Purpose
In addition to adding an extra layer of heavy-duty protection to the concrete subfloor, epoxy flooring adds color and shine. It usually comes with decorative chips that are added to the mix or sprinkled on the floor to create a unique look. Although you can have professionals install the epoxy, it’s also a relatively simple roll-on DIY process.
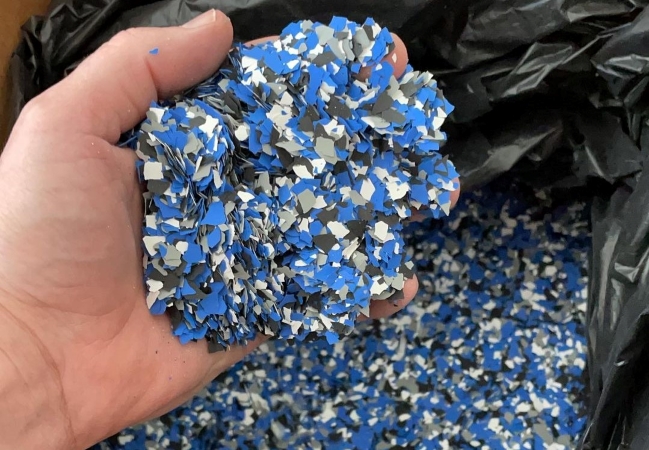
Decorative vinyl flakes used in epoxy flooring
(Source: @griind.work via Instagram)
These qualities make epoxy a good choice if you’re using your garage for more purposes than your home gym — whether for DIY home improvement projects, parking the car, or more. That’s why Stacie Walker, an avid DIYer and influencer living in the Atlanta suburbs, and her weight-lifting husband chose epoxy for their garage, which does triple duty as home gym, tool and project center, and even a kids’ play area.
“For my husband, the epoxy was really important because aesthetically it looks better — it really pops. But it also helps with maintaining the integrity of the concrete floor,” says Stacie. Besides making sure the garage floor is protected from damage from all their home projects, she says it’s a dream to clean.
“The thing I really, really love is the cleanup. The fact that I can sweep it, mop it, and things won’t absorb into the concrete like they did before. It’s easy to clean up and get rid of debris,” says the busy mother of three boys. “Plus, sometimes I send our boys out there just to run off some steam when the weather’s bad.”
According to Stacie, applying the epoxy was a straightforward process using an epoxy flooring kit they got at a home improvement store. (More on installation later.)
Q: How much does it cost to epoxy garage flooring?
A: For a DIY job, it will cost between $2 and $5 per square foot for your epoxy flooring kit and other materials. Professional epoxy flooring installation can range from $750 to $6,000, depending on the size of your garage.
Epoxy Garage Flooring Pros and Cons
Pros
Cons
What About Rubber or Foam?
Whether you choose to go with epoxy flooring or decide to stick with bare concrete, you’ll still need some type of cushioning to protect the subfloor and provide a comfortable surface for exercising and equipment that absorbs impact. That brings us to rubber or foam gym flooring.
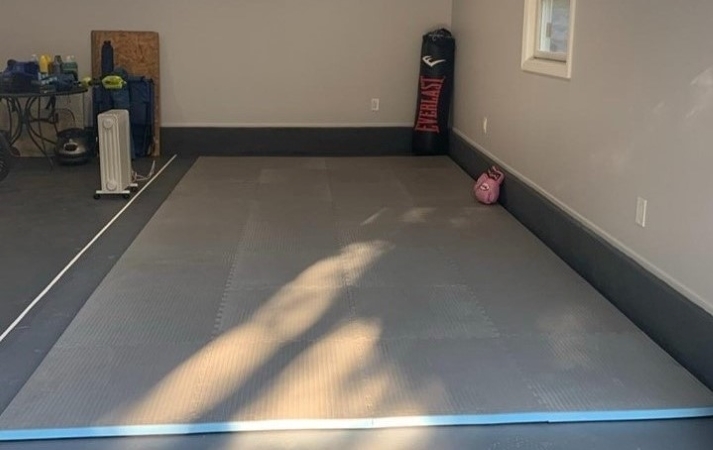
A garage gym with rubber mat flooring
(Source: @rubberflooringinc via Instagram)
Rubber Gym Flooring: Best Choice for Heavy Workout Machines, Weights, and Equipment
Widely used in commercial gyms, rubber flooring is considered the most durable choice for supporting heavy equipment like exercise machines, treadmills, and power lifting racks. The material is also tough enough to handle the shock of dropped weights — but only up to a point. (Don’t expect to repeatedly throw 50-pounders around without making a dent.) Rubber flooring also offers great traction, whether dry or wet from sweat.
Q: What’s rubber gym flooring made of?
A: The black material is made of recycled rubber, with colored flecks, which are made of synthetic rubber — or ethylene propylene diene monomer (EPDM), to be precise.
Q: What about cleaning rubber gym flooring?
A: The higher the quality (and cost), the denser the surface, which makes it longer lasting and easier to clean by damp mopping with mild soap and water.
If you decide to go with rubber, some gym flooring experts strongly recommend buying only American-made, because you’ll know exactly what materials are used. Some American gym flooring manufacturers even offer indoor air quality certification, which can be important for avoiding bad odors or excessive off-gassing. (Hey, we know you’re tough, but it’s kinda counter-productive to jeopardize your health while you’re working out.)
Rubber flooring comes in three options:
- Interlocking rubber gym tiles: These are great because they’re lighter, easier to handle, and can be used like puzzle pieces to customize your own home gym areas.
- Rubber gym flooring rolls: If you’re covering a larger area, like maybe the entire garage floor, rubber rolls are a good choice because the price per square foot may be less than tiles and they show fewer seams. However, rubber is heavy, so these can be harder to work with than tiles.
- Rubber gym workout mats: With most mats in 4'X6' size, these can be a good choice if you just have one or two areas you want to set up, such as beneath a heavy machine or a lifting rack. Choose from ¼" to ¾" thickness, depending on how much cushioning you want. Weighing in at about 60 to 75 pounds, the mat won’t move once it’s placed on your garage concrete floor. A good quality ⅜"-thick mat will run more than $100.
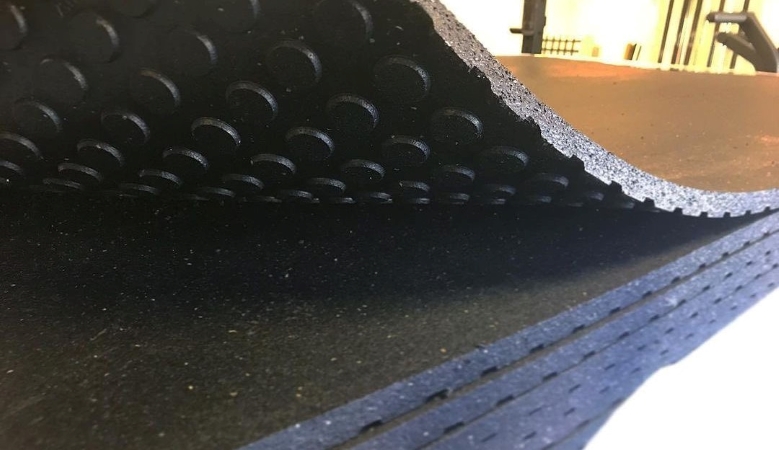
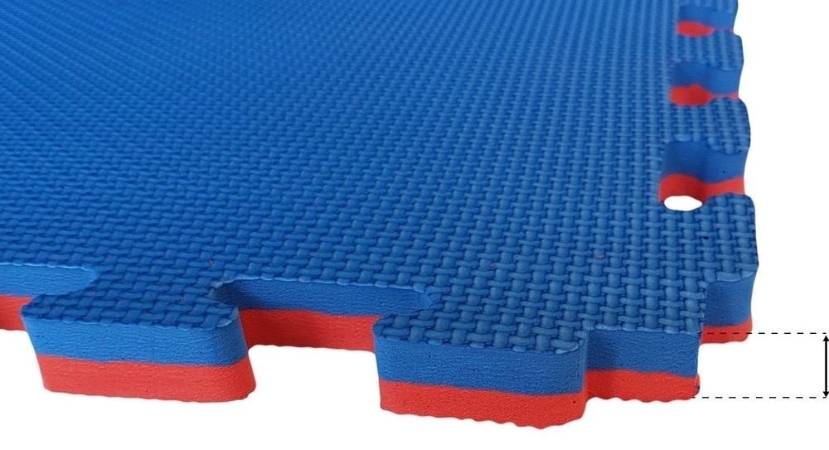
Rubber flooring tiles
(Source: @smashgymssunnyvale via Instagram)
Q: How thick should a gym floor be?
A: The most popular thickness for rolls is ⅜", while mats range from ¼" to ¾". If you often drop super heavy weights, then opt for at least ½" to be safe.
Q: How much does rubber gym flooring cost?
A: Rubber gym flooring rolls range from $1 to $5 per square foot. Rubber floor tiles generally range from $3 to $8 per square foot. A good quality ⅜"-thick, 4'X6' size mat will run more than $100. However, many variables affect the cost.
Rubber Flooring Pros and Cons
Pros
Cons
Foam floor mats
(Source: @greatmats via Instagram)
Foam Gym Mats for Garage Flooring: Most Budget-Friendly Choice for Lighter-Weight Needs
If your workouts involve lighter weights and/or exercise programs like yoga, Pilates, PiYo, or aerobics, dense EVA foam mats make a practical choice that’s a lot less expensive than rubber gym flooring. (Don’t get us wrong: We’re not saying that these exercise programs are any less intense or heavy-duty than weight lifting. They just don’t require heavy-duty flooring.)
Foam gym mats absorb impact well, which can provide important protection for your joints. They’re also soft enough to lay down on for stretching and floor exercise. However, foam mats won’t hold up if you have heavy exercise equipment such as a treadmill, as the foam will compress from the weight, creating deep indentations.
Since foam mats are less dense, they don’t provide as easy a surface to clean as rubber. However, you can perform some gentle mopping or scrubbing as long as liquids or cleaning solution doesn’t seep into the mat’s interlocking seams or through the mat to the floor. Because foam mats are lightweight, they’re much easier to work with, and you can just take them apart and shake them out when needed.
Foam gym mats come in two main options:
- Interlocking foam mat tiles: These look like giant puzzle pieces and usually come in sets. For example, six 24"X24" interlocking tiles, which will cover 24 square feet or a 6'X4' area. These are good for versatility and portability.
- One-piece foam mats: These mats generally come in a few sizes, starting slightly larger than a typical yoga mat at 6'X4' and ranging up to 6'X10'. The benefit is that these mats won’t come apart while you’re doing a downward dog pose or mountain climbers.
Foam floor mat
(Source: @evermatofficial via Instagram)
Q: How thick should foam gym mats be?
A: While the most popular foam gym tiles are about ½" thick, they can go up to ¾" to 1" in thickness, if you need more impact absorption. One-piece foam gym mats are generally just ¼" thick, which is a good bit thinner than tiles.
Q: How much do foam gym mats cost?
A: A set of six 24"X24" tiles, which will cover 24 square feet, costs as little as $25. One-piece foam gym mats typically cost from $140 to $280, depending on size.
Q: Is foam or rubber better for a home gym floor?
A: That depends on your specific needs. We’ve broken down the pros and cons of foam mats below, but it’s important to remember that foam flooring, while the least expensive option, doesn’t have the durability of rubber flooring. If you do any weightlifting or heavy resistance training or own several stationary machines, you’ll want to consider rubber instead of foam.
Foam Gym Mat Pros and Cons:
Pros
Cons
Installation Tips for Garage Gym Flooring
Can you put gym flooring on concrete? Of course! In fact, all of these types of flooring are pretty simple to install, but there are a few tips that will help the process go smoothly and set you up for workout success.

(Source: @staciesspaces via Instagram)
But then Stacie got an opportunity to use a PODS container to keep their gym, DIY equipment, and bikes right in their driveway. “Having the PODS container made it very, very convenient for us to still access our stuff. I was still able to do projects, the boys could ride their bikes, and I could use my gardening stuff, even though we were working on the garage floor,” says Stacie. “This was perfect for my husband to have his dream garage floors.”
Just getting started with your home workout plans? Get pumped with these home gym ideas on the PODS Blog. Or maybe you need to create more space in your garage to make room for your workout gear. These space-saving garage storage solutions can work magic.
Liz Taylor is a freelance writer based in Tampa who is always looking for ways to declutter after living in the same house for 28 years.
Related Articles
Comments
Leave a Comment
Your email address will not be published. Required fields are marked *